DIY WIFI Controlled RGB table lamp
Most people nowadays prefer to do home decoration. Light decorations are a major part of home decoration. Specially RGB-based light equipments are used to decorate both indoor and outdoor spaces. but RGB-based light equipments are very expensive because of its high demand. This life-saving tutorial will teach you how to make a cool and premium-looking WIFI-controlled RGB table lamp with low cost and easy steps.
Let's Get Started!
First, you have to have the below items:
- WS2812B Pixel LED Strip 30LEDs.
- 20mm diameter flexible PVC hose(22inches).
- Piece of thin metal wire.
- Single sunk box.
- Cable ties.
- 3mm nuts and bolts 4x.
- One 20mm flat washer.
- esp8266
Step 01:
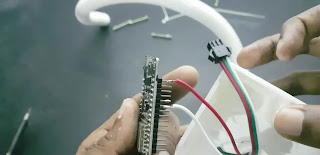
Make a 20mm diameter hole on the top of the sunk box to insert the flexible wire and also make four small holes inside, by the side, to insert the nuts and bolts. Also, make a cut to insert the USB port.
Step 02:
Tie the Pixel LED Strip by using the cable ties.
Step 03:
Put the LED strip into the flexible hose and secure it by using a washer.
Step 04:
Put the metal wire into the flexible hose and through the washer, and afterward secure it by bending the cable towards the washer.
Gently pull the metal wire from the other end and cut some of the excess pieces of the metal wire and lastly bend it towards the inside of the sunk box.
Step 06:
Go to your web browser and search install.wled.me

.jpg)


